PCI Express development on the cheap (well, sort of)

So I've been meaning to play with FPGAs and PCI Express for such a long time already now and, in light of some recent events, I decided that it's about time to finally take action. This post gives an overview of the hardware setup I arrived at using the PicoEVB development board with a Xilinx Artix 7 FPGA and a PCIe x1 Gen 2 host interface. The best thing about this is that you can get it starting at just $199 + shipping!

I was looking for a Xilinx kit specifically, and one that is also supported by Enjoy-Digital's open source LitePCIe project ("a small footprint and configurable PCIe core powered by Migen & LiteX") because I'd like to be able to experiment with these "new-fangled" HDLs, too (eventually). At work we have an AC701 evaluation kit from Xilinx, also with an Artix-7, but I didn't bother asking if I could borrow it because it's quite expensive ($1.295) and I'd be constantly worried not to damage the thing. Not fun. So I started searching the Web and stumbled upon the PicoEVB. I have to admit that I was rather judgemental of the board, mostly because of the unusual M.2 2230 form factor and the obvious scarcity of I/Os, connectors, anything. There just wouldn't be that much to evaluate, I thought. But then it dawned on me. For evaluating/prototyping PCI Express designs, the board does have everything that's needed at least to get started: An FPGA; flash memory; a built-in USB JTAG "cable"; a PCI Express interface, of course; and a couple of LEDs. No frills. It's supported by Vivado's free WebPACK edition and Enjoy-Digital's open source LiteX framework and LitePCIe in particular; probably also Symbiflow. Sample project, Linux drivers, various open source utilities all available. What more do I actually want? CrowdSupply offer was $219 + $25 shipping to Germany. Deal! Placed the order, and 5 (!) days later a small parcel arrived from some Mouser facility in Munich, Germany. (Now I do wonder about those shipping fees though!?)

So far, so good. But there's still the unusual (for an eval board that is) M.2 form factor. Well, it was clear to me from the beginning that I would have a setup with two boxen, one main workstation for development & simulation etc. and one "dumb" secondary host with the eval board (whichever it would be) plugged in to do the actual live testing on. I remember this being mentioned in some blog post way back when I first started looking into this kind of stuff, and I strongly recommend you follow this advice, too (at least for the time being). The thing is that the FPGA, via PCI Express, has access to the entire (physical) address space of its host, including kernel space. So when you make just the tiniest of mistakes e.g. in the implementation of your DMA engine, the FPGA will gradually clobber main memory until it hits something vital, giving you just enough time to realize what's going down before the system freezes or crashes. Then you have to reboot, fsck your hard drives (and hope for the best), and while trying to restore your session you discover that you've lost the last 5 minutes of work. I've been involved in the implementation of two DMA designs in my career and I can tell you first-hand that even the pros mess up (from time to time ;-)). I know I will mess up. Even if you're lucky and don't lose any changes, it can be utterly frustrating and kill your morale pretty quickly. Imagine it's late Tuesday night, you're trying to wrap your head around a particular issue and your workstation crashes for the third time in a row during a test and each time you have to start all over again, twiddling your thumbs, thinking about what went wrong, until Vivado is ready again—not to speak of the joy when manual recovery is necessary. It's a productivity killer if nothing else.

Anyway, I did have a spare (and sufficiently modern) PC for the PicoEVB at hand, but I still needed an adapter from M.2 2230 Key A/E to PCIe x1. These kind of adapters seem to be quite rare, but I eventually found an Amazon Warehouse deal for the Delock PCI Express Card > 1 x internal M.2 key E (Item No. 89889) for €18.03 total. While waiting for the adapter, I tried to find a spare hard drive that I could use to set up the secondary host PC for the eval board. What I dug up was a 120 GB 2.5" SSD, together with a vintage 2017 Intel NUC Kit NUC5CPYH featuring a Celeron N3060 (1.60 GHz) and 4 GB of RAM.
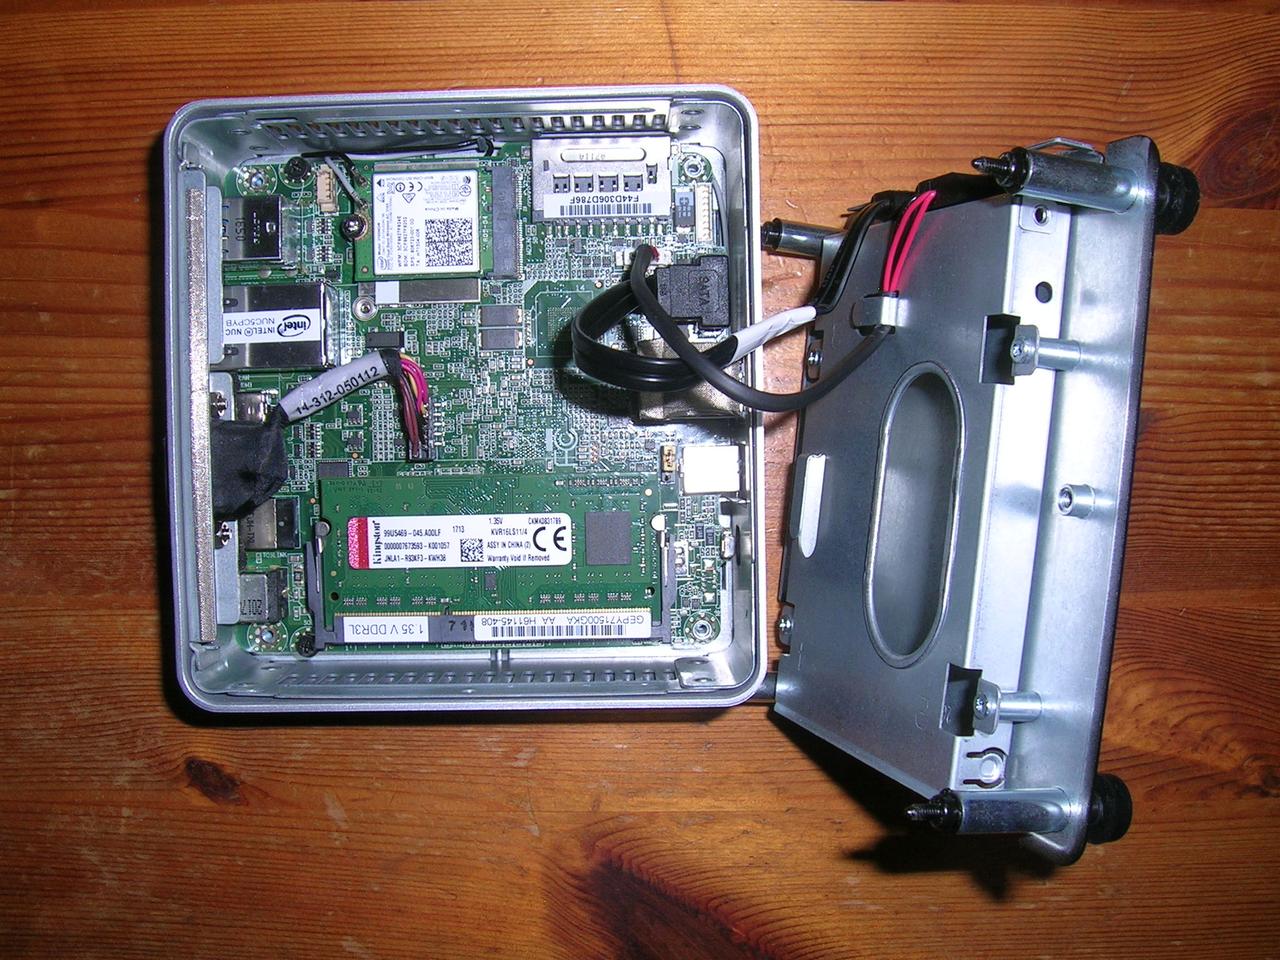
Inside view of the NUC5CPYH

I originally bought all that stuff a couple of years ago for a media center project that (somehow) never materialized, but what proved advantageous now because the NUC supports PCIe Gen 2 aaand... has an M.2 2230 A+E slot. Populated with an Intel Dual Band Wireless-AC 3165 (+ Bluetooth 4.2?) adapter card. It does also have wired Ethernet though, and I really liked the idea of having a small, quiet little box sitting on my desk instead of some cobbled together, unwieldy and probably rather noisy midi-tower taking up half of my real estate. It's also much easier to stow away or transport. Now a wireless connection to the test box would've been the icing on the cake, but I was willing to make compromises. The Delock adapter hadn't arrived yet, so I decided to just go ahead with the NUC setup. I carefully removed the wireless adapter with the two antennas still connected. The antennas' female U.FL connectors only have a rating for a precious few mating cycles and I've already made some bad experiences even with larger connectors (probably of bad quality to begin with) deteriorating after just a couple of reconnects. So I shoved a small plastic zipper bag over the assembly and keep it softly bent out of the way, which seems to work pretty good so far apart from that it's not straightforward anymore to close the case cover (well, case bottom actually, although it's feasible with a bit of effort). Next I installed the latest stable Debian 10.5 (with SSH server enabled) and finally (cold-)plugged in the PicoEVB.
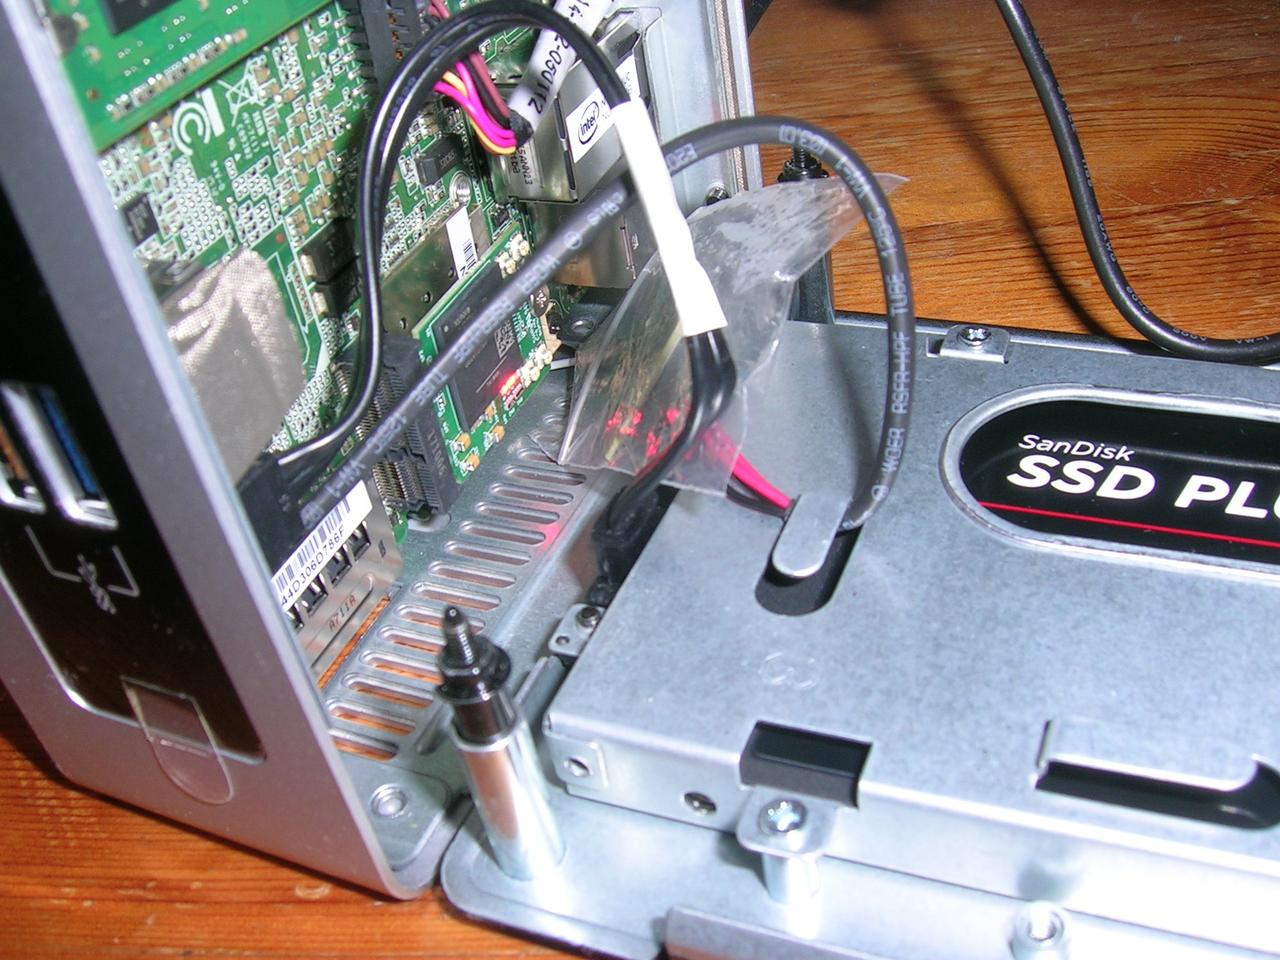
NUC with PicoEVB in Soft Off state

When the NUC is in Soft Off (S5) state, three red LEDs ('B', 'C', and 'A'—go figure!) on the PicoEVB board are on. Once the power button is pressed, LED 'B' (leftmost in the picture above) immediately starts to blink and continues to do so as long as the NUC is powered on. Furthermore two new devices show up, an FTDI USB to (ultimately, I guess) JTAG bridge and a Xilinx "serial controller":

  • lsusb

    Bus 002 Device 001: ID 1d6b:0003 Linux Foundation 3.0 root hub
    Bus 001 Device 003: ID 0403:6015 Future Technology Devices International, Ltd Bridge(I2C/SPI/UART/FIFO)
    Bus 001 Device 002: ID 05e3:0610 Genesys Logic, Inc. 4-port hub
    Bus 001 Device 001: ID 1d6b:0002 Linux Foundation 2.0 root hub
    
    
  • lspci

    00:00.0 Host bridge: Intel Corporation Atom/Celeron/Pentium Processor x5-E8000/J3xxx/N3xxx Series SoC Transaction Register (rev 21)
    00:02.0 VGA compatible controller: Intel Corporation Atom/Celeron/Pentium Processor x5-E8000/J3xxx/N3xxx Integrated Graphics Controller (rev 21)
    00:12.0 SD Host controller: Intel Corporation Atom/Celeron/Pentium Processor x5-E8000/J3xxx/N3xxx Series SD Controller (rev 21)
    00:13.0 SATA controller: Intel Corporation Atom/Celeron/Pentium Processor x5-E8000/J3xxx/N3xxx Series SATA Controller (rev 21)
    00:14.0 USB controller: Intel Corporation Atom/Celeron/Pentium Processor x5-E8000/J3xxx/N3xxx Series USB xHCI Controller (rev 21)
    00:18.0 DMA controller: Intel Corporation Atom/Celeron/Pentium Processor x5-E8000/J3xxx/N3xxx Series LPIO2 DMA Controller (rev 21)
    00:18.6 Serial bus controller [0c80]: Intel Corporation Atom/Celeron/Pentium Processor x5-E8000/J3xxx/N3xxx Series LPIO2 I2C Controller #6 (rev 21)
    00:18.7 Serial bus controller [0c80]: Intel Corporation Atom/Celeron/Pentium Processor x5-E8000/J3xxx/N3xxx Series LPIO2 I2C Controller #7 (rev 21)
    00:1a.0 Encryption controller: Intel Corporation Atom/Celeron/Pentium Processor x5-E8000/J3xxx/N3xxx Series Trusted Execution Engine (rev 21)
    00:1b.0 Audio device: Intel Corporation Atom/Celeron/Pentium Processor x5-E8000/J3xxx/N3xxx Series High Definition Audio Controller (rev 21)
    00:1c.0 PCI bridge: Intel Corporation Atom/Celeron/Pentium Processor x5-E8000/J3xxx/N3xxx Series PCI Express Port #1 (rev 21)
    00:1c.1 PCI bridge: Intel Corporation Atom/Celeron/Pentium Processor x5-E8000/J3xxx/N3xxx Series PCI Express Port #2 (rev 21)
    00:1c.2 PCI bridge: Intel Corporation Atom/Celeron/Pentium Processor x5-E8000/J3xxx/N3xxx Series PCI Express Port #3 (rev 21)
    00:1f.0 ISA bridge: Intel Corporation Atom/Celeron/Pentium Processor x5-E8000/J3xxx/N3xxx Series PCU (rev 21)
    00:1f.3 SMBus: Intel Corporation Atom/Celeron/Pentium Processor x5-E8000/J3xxx/N3xxx SMBus Controller (rev 21)
    02:00.0 Serial controller: Xilinx Corporation Device 7021
    03:00.0 Ethernet controller: Realtek Semiconductor Co., Ltd. RTL8111/8168/8411 PCI Express Gigabit Ethernet Controller (rev 15)


So apparently the PicoEVB FPGA is already configured. I assume that the flash memory is pre-loaded with the (only, at this writing) sample Project-0, which includes an spi-loader implementation (the "serial controller"?). The README explains the behavior of LED 'B' quite nicely, but it also says that LED 'A' "lights up if FPGA is overtemperature or one of the FPGA voltage rails are out of spec"—which sounds rather worrisome. If that actually turns out to be the case, then there's nothing I can do about it right now, and probably at all I'm afraid. The FPGA is definitely not hot, not even warm, and also LED 'A' is on even in S5!? Maybe I'll double-check this with the Delock adapter in my workstation... we'll see.
Summary of reading: January–March 2020

This post (the first in a long row, hopefully) is inspired by Eli Bendersky's Summary of reading posts where I've more than once found a good read or two.

  • Edward Snowden: Permanent Record – was a Christmas gift from my brother and his wife (thanks again!). The German subtitle is "Meine Geschichte" (my story) and the book is indeed an autobiography. While it naturally also describes technical aspects it has to make concessions and the explanations are tailored to a general non-technical audience. But that's OK, the focus and strength of the book are the people, first and foremost of course Snowden himself. He's an interesting personality and tells an engaging story. On second thought though the book is actually not about people. It's about systems. How they lure you in. How they support and comfort you. How you become a part of them. And how they can turn against you or your loved ones at whim. Snowden decided to expose the system, which makes him a traitor in the eyes of many. The system is still instated. An important battle has been won thanks to the sacrifice of Edward Snowden (and many others), but the war is still waging. It is not sufficient to expose or even "destroy" the system; it has to be replaced [1]. The system thrives or dies on decisions made every day, by all of us. Decisions not as dramatic as in Snowden's case, but also not as hard or consequential. Recommended reading.

    Arguing that you don't care about the right to privacy because you have nothing to hide is no different than saying you don't care about free speech because you have nothing to say. –Edward Snowden

  • Philip K. Dick's Blade Runner – what can I say, it's a classic, and I got hold of a new German translation. Normally I'm not too fond of reading the book after having watched the movie (because I inevitably visualize the scenes), but in this case I realized pretty quickly that the plot is quite different. The theme and the atmosphere are the same, but the storyline is totally different—which really confused me in the beginning because I had no recollection of that movie. And maybe I do misremember Harrison Ford-Deckard, but I feel that the Deckard in the book comes across much more mundane and almost shallow, always worrying about money, his fake pet sheep, how to get a real one and what the neighbors might say if they find out. True to the original, now subtitle of the book Do Androids Dream of Electric Sheep I guess. What surprised me the most though is that even the iconic "Tears in rain" monologue in the film is actually not from the book! Anyway, I'd recommend the book even (or maybe all the more) if you've already seen the movie.

  • The Order of Time by Carlo Rovelli – a popular science book similar to Stephen Hawking's A Brief History of Time. I read the German edition ("Die Ordnung der Zeit"); the translations for these kind of books are usually pretty good and it makes for a more pleasant reading because I don't have to guess (or look up) technical terms. The book consists of three parts. Part I deconstructs our "intuitive" notion of time and describes what scientists have discovered about the nature of time in the last couple of thousand years. Basically all of our assumptions don't stand up to scrutiny. One thing in particular I hadn't realized before is how much the Newtonian world view has apparently shaped our thinking and education, and really our "intuition" about time (among other things). Anyway, part I is a concise "history of time" that alone is already worth the read. Part II is rather short and somehow too "philosophical"; I didn't understand what it was supposed to convey. Part III finally develops a new notion of time in which entropy, relations of events and (un)certainty play the central role. Although handwavy and a bit unconnected, the author manages to paint a fascinating picture of (t)his promising Loop Quantum Gravity (LQG) theory and provides a lot of food for thought. Oh and BTW, if during part III you, like me, keep thinking "that sounds a lot like what that Lee Smolin guy I saw on Youtube was saying", you're not mistaken: He's mentioned in the author's bio as the co-creator of LQG and has also written a couple of (I guess) popsci books on the subject. This definitely all sounds quite exciting.

  • Functional Programming in C++ by Ivan Čukić – a great introduction to key ideas and concepts of functional programming, how they can be applied using C++ and why they make for better designs and programs. The book contains a lot of (I'd say advanced) code and is not suitable for beginners. But everything is explained in detail, often supported with diagrams and tables. I have to say that this was really an eye-opener for me. In particular the (motivation for) ranges [2] and the monad chapter gave me some aha moments. I only skimmed the last two chapters, but I plan to reread parts of the book anyway once I get around to using some of the stuff in my personal projects. If you're a practicing "object-oriented" C++ programmer and want to expand your knowledge portfolio, this is definitely a book to consider. If you're curious go see this more in-depth review by Sumant Tambe.

  • The Pragmatic Programmer: your journey to mastery – is the title of the 20th anniversary edition of this now classic software engineering book by David Thomas and Andrew Hunt. When I started my professional life in 2008 a senior colleague (a CS guy; hey Martin!) gave me a (100% legal I'm sure) PDF copy of the first edition of the book and advised me to read it. He was also a Ruby guy (Ruby was at peak hype back then I believe). I had no use for Ruby, and I wasn't pragmatic. I didn't read the book. After reading the new edition I really wish I did, because I had to learn a lot of the stuff the hard way, by making mistakes. And while I think that many of the ideas have become part of the collective wisdom (in one form or the other), it's always nice to see a coherent and comprehensive exposition that IMO only a book can provide. Yes, you can glean the gist of it from blog posts, journals, advice from coworkers, own experience, etc. but it's not the same. You're missing the whole picture. So don't make that mistake. Read the book now. (Or at least read this recent review by Swizec Teller.)

[1] Russell Brand's Youtube channel
[2] There seem to be concerns about The Surprising Limitations of C++ Ranges Beyond Trivial Cases pretty recently still though.

Hello Python, this is C++ calling!

In this blog post I'll give a quick rundown on how to embed the CPython interpreter in a C++ application and call a Python function from C++, with C++ arguments, all using Pybind11 on Linux. The HTML for this post was generated from an Org mode document that contains noweb-style literate programs. I got inspired to try that out after reading Linux containers in 500 lines of code by Lizzie Dixon. We'll see how it goes.

At work we're developing high-end test and measurement equipment and among other things I'm responsible for the software interface layer to our FPGA-based data acquisition subsystem. Now when our hardware engineers are developing a new feature or we need to debug an issue reported by CI (black-/gray-box tests), QA, or—occasionally—even customers, every so often some temporary tweaks to our C++ hardware abstraction layer are required to allow these guys to drill down and identify the root cause of a problem. In particular, this means custom (to the problem at hand) modifications to the configuration data1 that are sent to the FPGAs via PCI Express, which basically constitutes the lowest-level hardware/software boundary. And while we do have a few callbacks in place for the "common cases" these are mostly observers and more crucially, they're thoroughly C++ APIs. Our hardware engineers do not touch anything C++. Luckily, most of them know their way around Python, at least a bit. So I decided to leverage that and see if I could provide a Python callback for the FPGA configuration data! Which would then hopefully enable our (digital) hardware engineers to work independently on a large portion of cases that currently require close cooperation with a systems software engineer (that is usually me).

I've used Boost.Python a couple of years ago to create Python/C API bindings for one of our C++ libraries, but quite honestly even back then Boost.Python felt old. Since then I've become less enthusiastic about Boost in general and although I gather that development has resumed (?), I personally consider Boost.Python stale at this time and wouldn't use it for new projects. Fortunately there is a successor in spirit based on C++11, the aptly-named Pybind11, which we'll make use of here straightaway.

The plan is as follows: We'll create a skeleton C++ application with the minimum scaffolding necessary to evaluate a Python (.py) source file and then call a Python function with a given name (defined in that file, obviously), passing in a reference to a C++ buffer (with the FPGA configuration data from above). The Python function may then read and/or modify the buffer's contents to its liking before ceding control to C++ again.

Alright let's start with the setup of the build environment; I've deliberately kept things terse/declarative and trust that you'll be able to adapt this to your specific circumstances if need be. First I installed Pybind11 using the Fedora package manager:

$ sudo dnf install pybind11-devel

I use CMake out of habit, rather boring:

cmake_minimum_required (VERSION 2.6)

project (cppydemo)

set (PYBIND11_CPP_STANDARD -std=c++11)
find_package (pybind11 REQUIRED)

add_executable (cppydemo main.cpp)
target_link_libraries (cppydemo PRIVATE pybind11::embed)

And that's about all we need to get going. Here's the outline:

#include <array>
#include <cstdint>
#include <cstdlib>
#include <ostream>
#include <sstream>

#include <pybind11/embed.h>

namespace py = pybind11;

<<define fpga config python wrapper>>

int
main()
   {
   <<create embedded python interpreter>>
   <<set up python scope>>
   <<evaluate python script>>
   <<call python function>>
   return EXIT_SUCCESS;
   }

Creating the embedded Python interpreter is straightforward.

<<create embedded python interpreter>> =

py::scoped_interpreter interp;

Next we prepare the Python scope in which we're going to evaluate the Python script. Since module __main__ is apparently already built into the interpreter, we'll just use that as our default scope.

<<set up python scope>> =

auto const py_main = py::module::import("__main__");
auto const py_FpgaConfig = py_class_FpgaConfig(py_main);

Defining the Python wrapper for the C++ FPGA configuration buffer was actually the most intricate part and it took me a while to figure this out. The configuration data1 controls the entire DAQ subsystem of up to 15 FPGAs and consists, broadly speaking, of an array of 1024 32-bit "dwords". These are the data that we'd like to access and manipulate from a Python script.

<<define fpga config python wrapper>> =

using dword = std::uint32_t;  // legacy

std::array<dword, 1024> g_fpga_config;

In order to avoid copying around 4 KiB blocks all over the place we implement the Buffer Protocol for our wrapper to directly expose C++ memory to Python. We can then create memoryviews for efficient, zero-copy access to the underlying buffer as appropriate. For ease of use we also provide basic implementations of the __len__(), __getitem__(), and __setitem__() special methods, supporting only integer arguments but not slices.

<<define fpga config python wrapper>> +=

struct fpga_config_view
   {
   dword *dwords;
   std::size_t n;
   };

std::ostream &
operator<<(std::ostream &lhs, fpga_config_view const &rhs)
   {
   return lhs << "fpga_config_view@" << &rhs << "{dwords=@" << rhs.dwords << ", n=" << rhs.n << '}';
   }

py::object
py_class_FpgaConfig(py::module const m)
   {
   return
     py::class_<fpga_config_view>(m, "FpgaConfig", py::buffer_protocol())
       .def(py::init<fpga_config_view>())
       .def("__len__", [](fpga_config_view const &cfg)
	  {
	  return cfg.n;
	  })
       .def("__getitem__", [](fpga_config_view const &cfg, std::size_t const i)
	  {
	  if (i < cfg.n)
	     return cfg.dwords[i];

	  throw py::index_error();
	  })
       .def("__setitem__", [](fpga_config_view &cfg, std::size_t const i, dword const val)
	  {
	  if (i < cfg.n)
	     cfg.dwords[i] = val;
	  else
	     throw py::index_error();
	  })
       .def_buffer([](fpga_config_view &cfg)
	  {
	  return py::buffer_info(cfg.dwords, static_cast<ssize_t>(cfg.n));
	  })
       .def("__str__", [](fpga_config_view const &cfg)
	  {
	  std::ostringstream ss;
	  ss << "FpgaConfig" << '{' << cfg << '}';
	  return ss.str();
	  });
   }

Now we are ready to actually evaluate a Python script. Note that it is possible for the script to use the FpgaConfig type already during evaluation.

<<evaluate python script>> =

py::eval_file("cppydemo.py", py_main.attr("__dict__"));

The script is supposed to define a process_fpga_config function with a single parameter (assuming type FpgaConfig):

def process_fpga_config(cfg):
    print(cfg)
    ...

The final step is then to retrieve a handle to that function and call it with a view of our FPGA configuration buffer.

<<call python function>> =

auto const py_process_fpga_config = py_main.attr("process_fpga_config");
auto const py_fpga_config = py_FpgaConfig(fpga_config_view{ g_fpga_config.data(), g_fpga_config.size() });
py_process_fpga_config(py_fpga_config);

And that's about all I have right now! At this point it's really just a demo, but it should hopefully give you an idea what's possible and provide a good starting point for further experimentation/exploration. You can download the "tangled" source files.

Footnotes:

1

To clarify: I'm not talking about an FPGA bitstream here, which contains the programming information for an FPGA, but about application configuration data that tells the already programmed FPGA what to do.

Installing HP LaserJet CP1525n color on Fedora 29

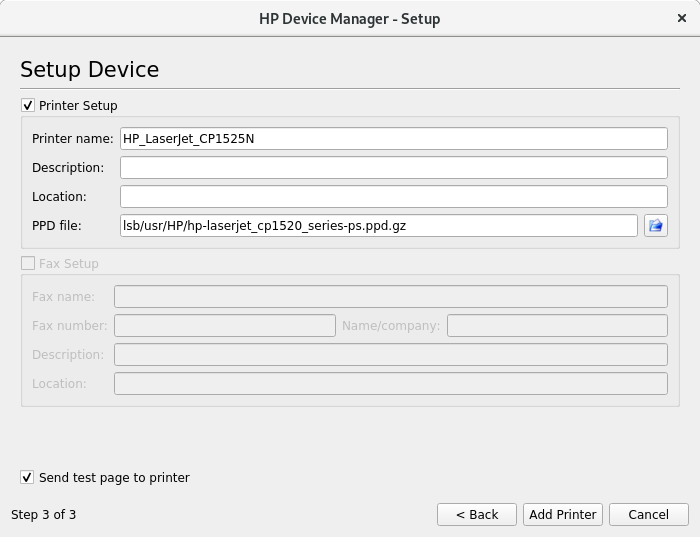
I finally figured out how to properly install my venerable HP LaserJet CP1525n color yesterday after system-upgrading to Fedora 29! The printer is connected via Ethernet, and previously I used Fedora's Settings > Devices > Printers GUI wizard to install a driver. Since there is/was no exact match in the driver list, I selected HP Color LaserJet Series PCL 6 CUPS (color) or something like that, thanks to this thread I found on the HP Community forums. While that worked and I could actually print black&white (or so I thought) text, the quality was ranging from acceptable to borderline unusable: The letters on a page had a growing, from left to right, kind of blue (colored!?) shadow which made e.g. papers with small font sizes effectively unreadable. As usual, everything works fine under Microsoft Windows 10, so I knew it had to be a driver issue (alignment?) but didn't have any clue how to go about fixing it. And yes, I also tried to set up HPLIP (HP Linux Imaging and Printing) several times before, but always failed with some sort of "connection error" IIRC. Anyways, after upgrading to Fedora 29 Workstation a couple of days ago I decided to give HPLIP another try—I must have been missing something after all. And indeed (I already gave it away), this time I found the missing piece! Here's what worked for me:

$ sudo dnf install hplip hplip-gui
$ xhost +local:root  # allow root to connect to our X server
$ sudo hp-setup
HP Linux Imaging and Printing System (ver. 3.18.6)
Printer/Fax Setup Utility ver. 9.0

Copyright (c) 2001-15 HP Development Company, LP
This software comes with ABSOLUTELY NO WARRANTY.
This is free software, and you are welcome to distribute it
under certain conditions. See COPYING file for more details.

QStandardPaths: XDG_RUNTIME_DIR not set, defaulting to '/tmp/runtime-root'

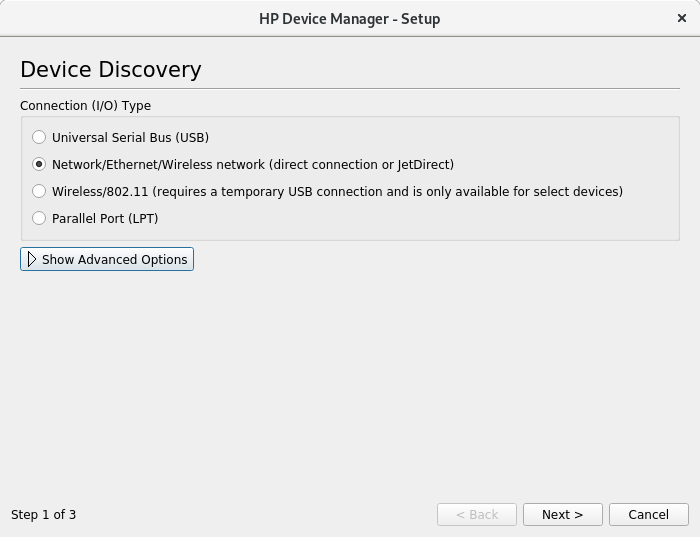
HP Device Manager - Setup: Device Discovery

Searching... (bus=net, timeout=5, ttl=4, search=(None) desc=0, method=slp)

HP Device Manager - Setup: Device Discovery

Now when I click through, I always got the following error:

error: Unable to communicate with device (code=12): hp:/net/HP_LaserJet_CP1525N?ip=192.168.1.1
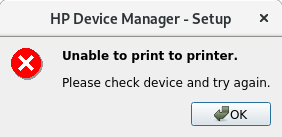
error:  Unable to print to printer.  Please check device and try again.

HP Device Manager - Setup: Unable to print to printer

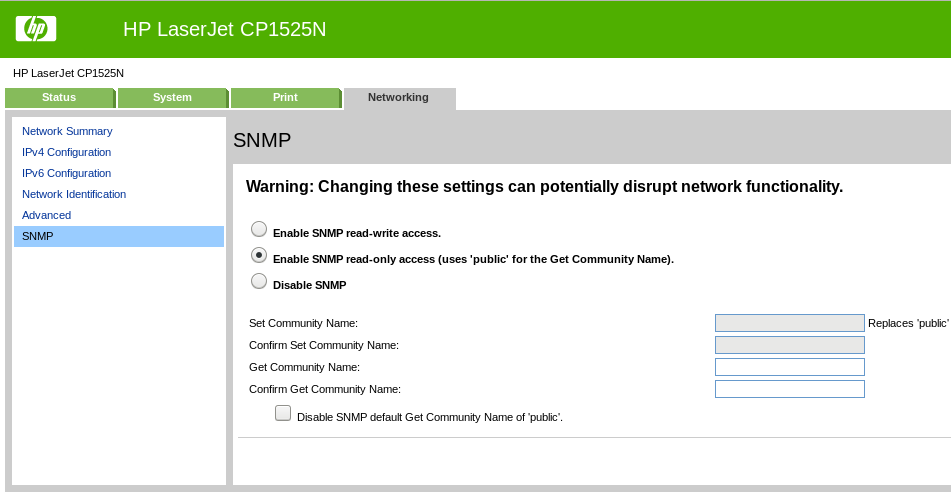
I finally found the solution to this problem on the LinuxQuestions.org forums in a thread with the apt title hplip error: Unable to communicate with device (code=12): One simply needs to enable (read-only) SNMP access on the printer. Duh! So let's do this.

HP LaserJet CP1525n web interface: Networking SNMP configuration

Success! Now to be honest, it might very well be that I had explicitly disabled SNMP during initial setup years ago (it isn't required with MS Windows, mind you). I can't remember. Nevertheless the error message "Unable to print to printer" (oh really!?) is a classic. A tiny hint regarding SNMP would have allowed me to solve this in virtually no time (well, presumably). This is actually one of my pet peeves, because omitting anything meaningful or tangible/actionable seems just so prevalent. Yeah, it could be worse. ∗sigh∗ Incidentally, I have this link to a 5 minute read about The Art of the Error Message in my bookmarks.

I'm also pretty sure there is a way to accomplish all of this without the need for a graphical user interface (X, web browser) and clicking on a mouse button, but I'm rather happy for now…

$ xhost -local:root  # revoke access again

Announcing contagiousbt-bencode

In this short blog post (my first "real" one, actually) I would like to announce the initial release of contagiousbt-bencode, a lightweight modular C++ library for reading/decoding data in Bencode format. I develop this library as a component for my BitTorrent client in the making (contagiousBT, obviously---don't hold your breath though), but since it turned out quite nicely I decided to go ahead with publishing it as a standalone project now.

contagiousbt-bencode comes with a couple of unit tests and even code coverage, although both are far from complete and for the time being the latter is more or less experimental in nature. Documentation is still lacking quite a bit, too, but I hope that the APIs are simple and straightforward enough to not make this carry too much weight. All in all the library could do with some (more) polish, but I'm not aware of any serious issues. As mentioned above, for now the project primarily (not to say exclusively) caters to my own needs. That doesn't mean it shouldn't evolve. I plan to maintain it for the foreseeable future and welcome comments or constructive criticism.

So, without any further ado head on over to the Git lab and take a look at the bencode project repository; the README seems like a good place to start your exploration. If you would rather see some code using the library, there's an example showing how to compute the infohash of a .torrent file.

Beginning

"I am just now beginning to discover the difficulty of expressing one's ideas on [a weblog]. As long as it consists solely of description it is pretty easy; but where reasoning comes into play, to make a proper connection, a clearness & a moderate fluency, is to me, as I have said, a difficulty of which I had no idea."

—Charles Darwin (in a letter to his sister Caroline)